CS 122A: Brightness and Humidity Checker
April 2022
See project files
See documentation
Summary
The Brightness and Humidity Checker was a project for the CS122A - Intermediate Embedded and Real-Time Systems course at UC Riverside.
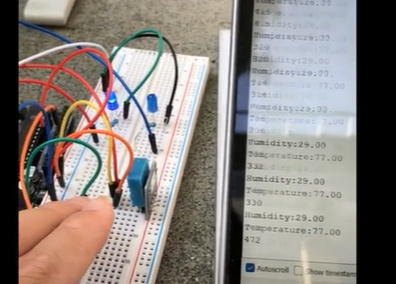
I measured temperature and humidity with Arduino project that had breadboard, LEDs, and resistors.
Materials Used
Laptop, Arduino , UNO R3 Controller Board, breadboard, 2 LEDs, photoresistors, resistors, DHT11 Temperature and Humidity Module, wires
Definitions
The Temperature and Humidity module is a module that can determine the temperature and humidity of the surroundings of a circuit.
Photoresistor: light-sensitive devices that can measure the light intensity. Source: EE POWER
Explanation of the Project
The code was written using the Arduino programming language in the Arduino application. I used a blue USB cable to upload the code onto the Arduino UNO R3 controller board. The controller board was connected to the DHT11 Temperature and Humidity Sensor.
Every 1000 ticks (1 second), the machine does 2 tasks:
- Check the brightness of the surroundings
- Check the temperature and humidity of its surroundings.
The photoresistor checks the brightness of its surroundings and returns a number. The number is between 0 and 1024, where 0 is maximum brightness and 1024 is minimum brightness.
    if number is less than 600:
        1 LED light will turn on
        if number is less than 400:
            a second LED will also turn on (2 LED lights will be on)
1 LED is on. The LED brightness is less than 600.

2 LEDs are on. The LED brightness is less than 400. The brightness is higher than the brightness in the previous picture.
In the Arduino system, I used Serial.print() statements to make sure the functions worked as intended.The serial monitor printed out the brightness, temperature, and humidity.